Campaign Creation
Launching a new email campaign in cmercury is a seamless process designed for efficiency and ease of use. Let’s go through the step-by-step guide to campaign creation and deployment.
Steps to Create a Campaign
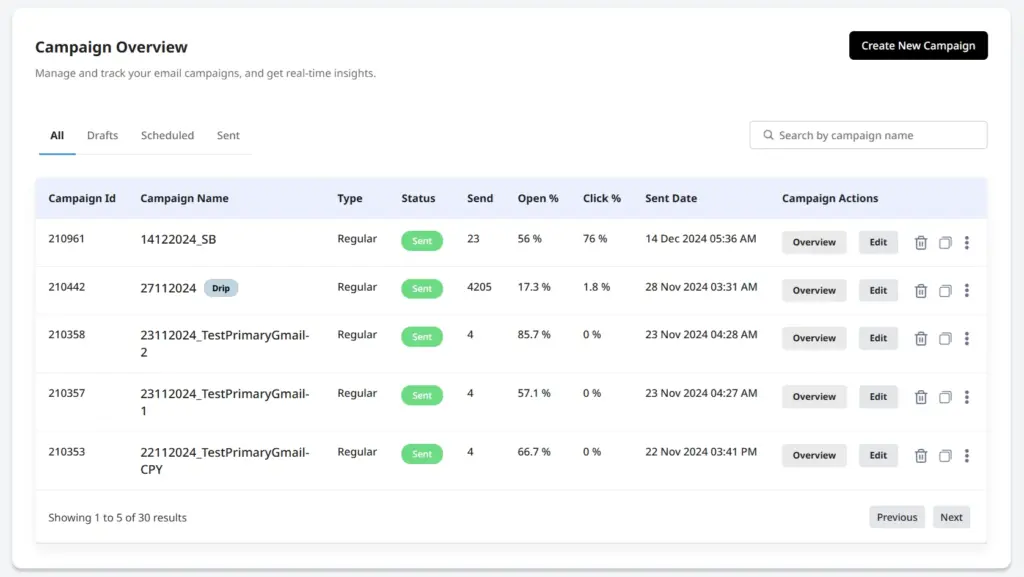
Step 1: Accessing the Campaigns Module
To create a new campaign in cmercury, follow these steps:
- Click on Campaigns in the main menu.
- You will be directed to the Campaign Overview page.
- Click the Create New Campaign button to begin the setup process.
- Alternatively, you can initiate campaign creation from the Dashboard by clicking the Create New Campaign button there.
Step 2: Selecting the Campaign Type
After selecting an audience, choose the type of campaign:
- Regular Campaign – A standard email blast to the selected audience.
- A/B Testing (Coming Soon)
- Distribution Campaign (Coming Soon)
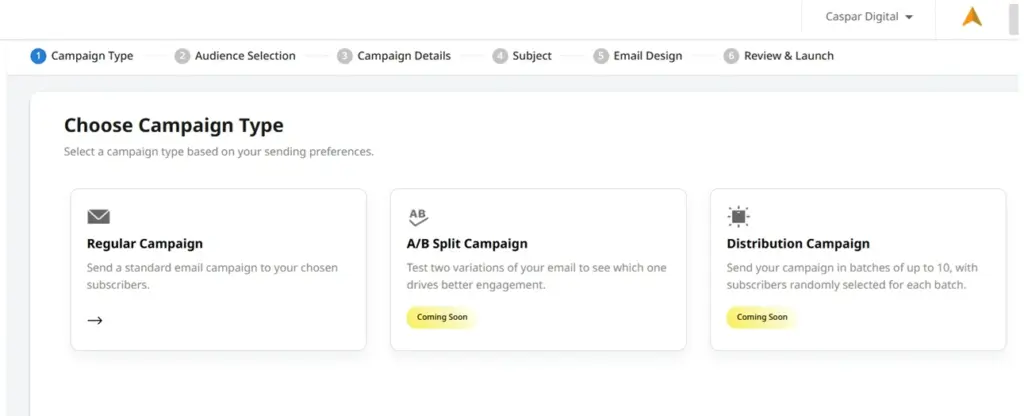
If you select Regular Campaign, you are redirected to the next setup page.
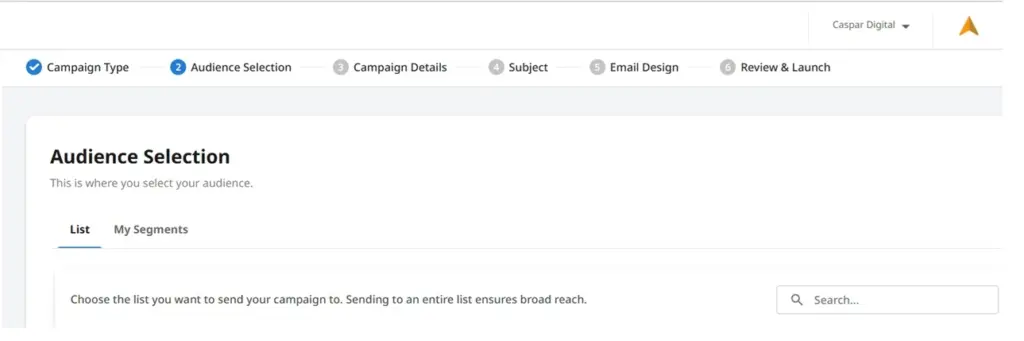
Step 3: Audience Selection
The first step in campaign creation is selecting your audience.
- Once you click Create New Campaign, you are redirected to the Audience Selection Module. To learn more about Audience Selection Module, click [here] (redirection to Audience Selection Module).
- Click the Create Campaign button next to your chosen list or segment to proceed.
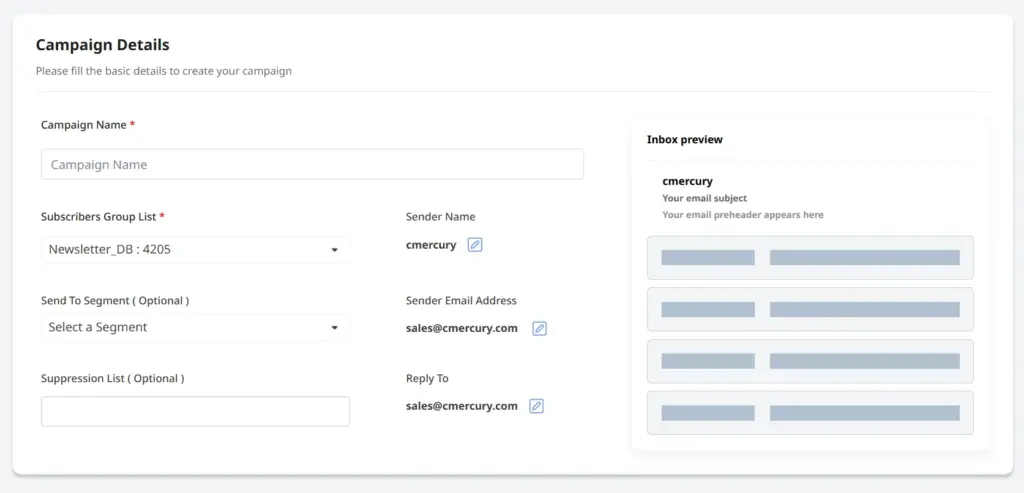
Step 4: Configuring Campaign Details
On the Campaign Details Page, you can:
- Enter a Campaign Name.
- Edit the Sender Name, Sender Email Address, and Reply-To Address (only pre-configured domains can be used).
- View the selected List/Segment.
- Add a Suppression List from existing suppression lists.
- Click Next to proceed.
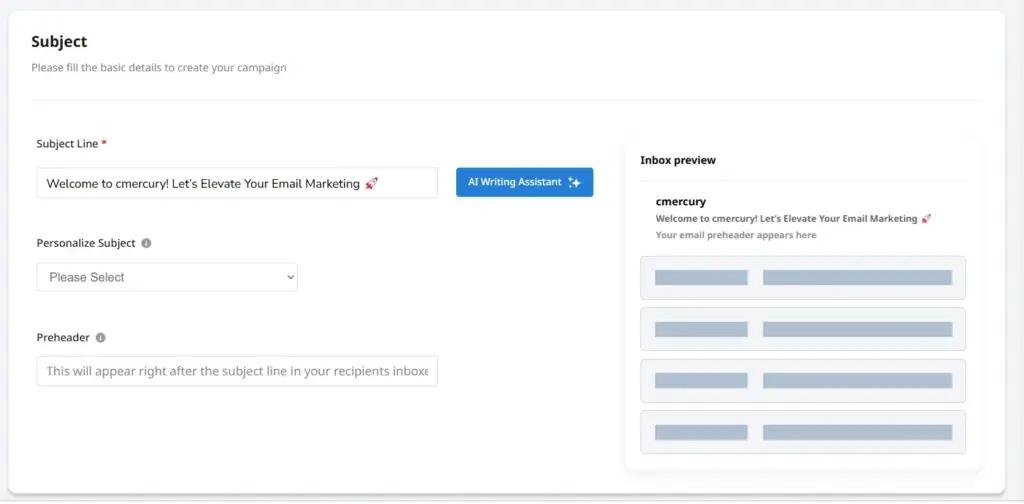
Step 5: Setting Email Subject & Preheader
- Enter the Subject Line (with personalization options like first name).
- Enter the Preheader Text.
- Use cmercury AI Assist to generate engaging subject lines by selecting:
- Tone (Luxury, Professional, Persuasive, Fashionable, Adventurous, Witty, Relaxed, etc.).
- Email Type (Promotional or Transactional).
- The Inbox Preview displays how the subject and preheader appear in recipients’ inboxes.
- Click Next to continue.
Step 6: Designing the Email Template
Now you can design your email using one of the following methods:
- Template Gallery – Choose from a selection of pre-designed templates.
- Custom HTML Editor – Copy and paste your HTML directly within the platform.
- HTML Upload – Upload your pre-designed HTML email template as a file.
- Zip Upload – Upload a zipped folder containing your email assets.
- URL Import – Import an HTML email design from a specified URL.
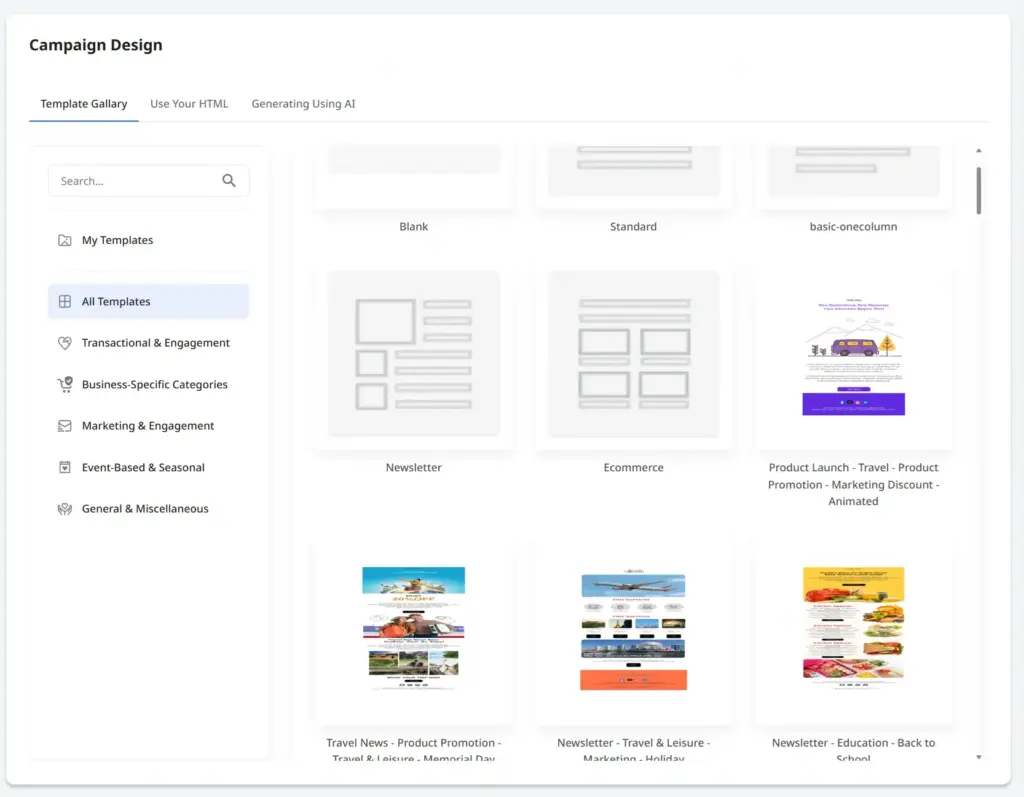
Once the HTML is uploaded, users can:
✅ Modify the code using the Code View
✅ Make visual changes and preview the campaign in Design View
Coming Soon: AI-Based HTML Generation – cmercury will soon introduce an AI-powered email template generator to help you create high-converting, visually appealing emails in seconds. Stay tuned for this exciting update!
Once your template is finalized, click Next to proceed.
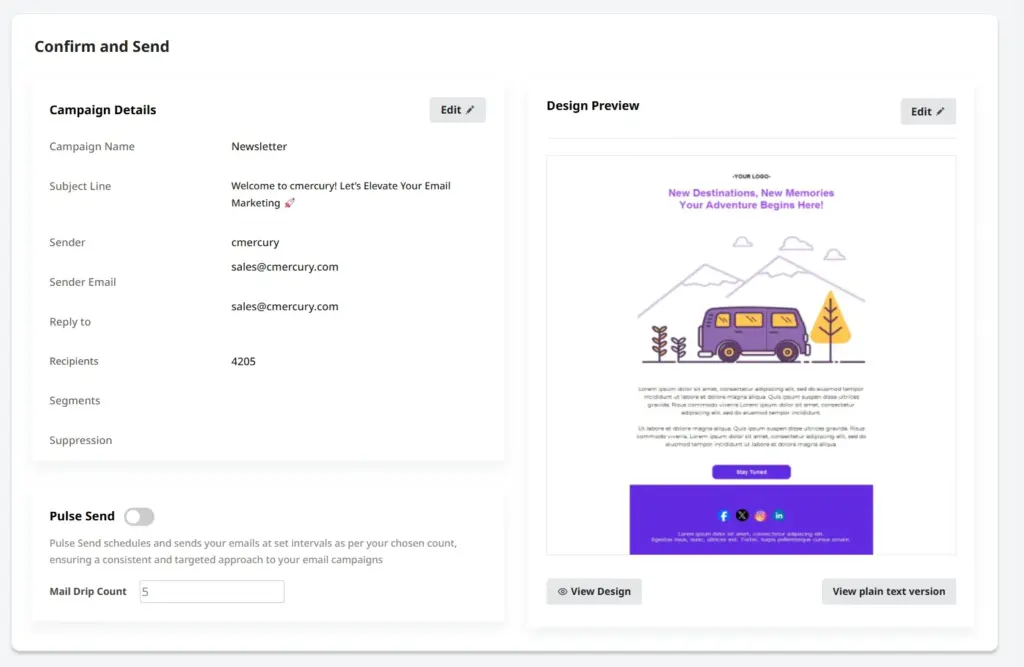
Step 7: Campaign Preview & Finalization
The Campaign Preview Page displays a summary of the campaign, including:
- Campaign Name
- Subject Line
- Sender & Reply-To Email Addresses
- Audience Selection
- Suppression List
- Recipient Count
Users can:
- View Design Preview (HTML & Text Versions).
- Add a Text Version if missing.
- Conduct a Quick Test by sending a preview email.
- Click Launch Campaign to either:
- Send Immediately
- Schedule for Later
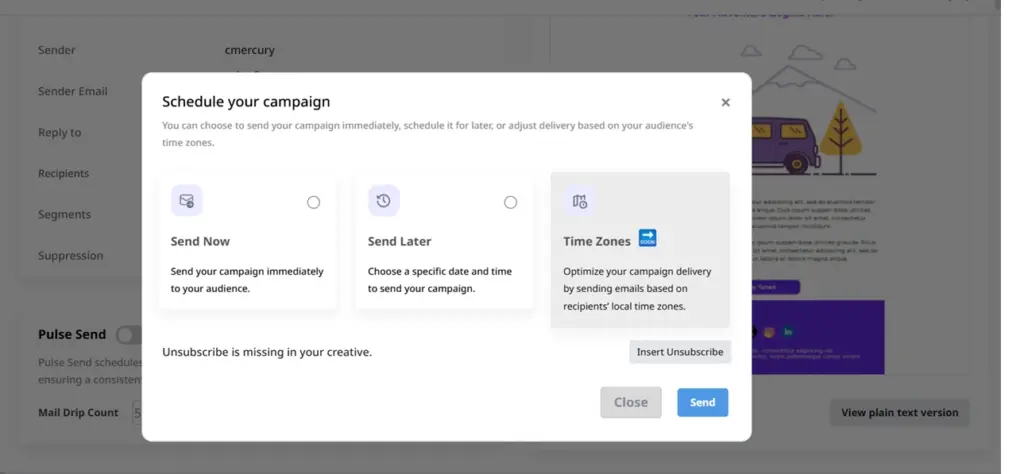
Step 8: Final Review & Launch
Before launching your campaign, review the final details and make any necessary edits.
Preview & Testing:
- View the Design Preview in both HTML & Text versions.
- Add a Text Version if it is missing.
- Conduct a Quick Test by sending a preview email.
Final Edits:
- Modify Campaign Details if needed.
- Make last-minute changes to the Design Preview.
- If the unsubscribe link is missing, cmercury will prompt you to add it with a single click.
Adaptive Flow – Optimize Email Deliverability
- cmercury offers a Adaptive Flow feature, allowing you to control the email throughput.
- If you choose this option, specify the number of emails to be sent per 5 minute.
- This unique feature improves email deliverability by preventing sudden spikes that could trigger spam filters.
Launching Your Campaign:
- Send Immediately or
- Schedule for Later based on your preferred timing.
Conclusion
The Campaign Creation Module in cmercury provides a streamlined, step-by-step approach to setting up and launching email campaigns. From selecting your audience and defining campaign details to crafting engaging content and reviewing final settings, every stage is designed to enhance efficiency and precision. The intuitive interface, AI-powered assistance, and flexible scheduling options empower users to create impactful email campaigns that drive engagement and results. By following this guide, you can ensure that your campaigns are well-structured, targeted, and optimized for success.
For further details, refer to our Segmentation Module or Campaign Troubleshooting Guide.


