List Management
Accessing and Managing Lists
When accessing the Audience module, the List tab is displayed by default. Users can:
- Filter lists by type (Mailing or Suppression) and status (Active or Inactive).
- Search for a list using the list name.
- Use the Settings menu to manage blacklists and global unsubscribes.
List Overview
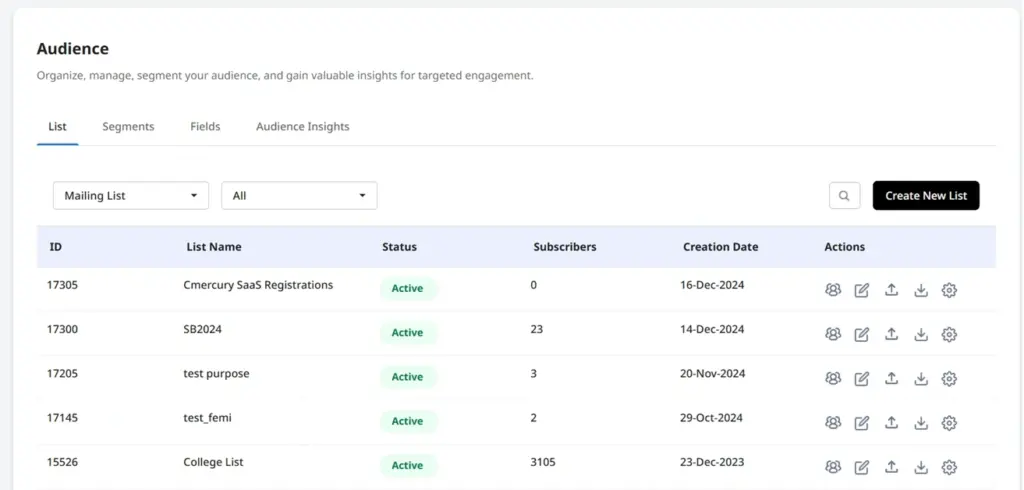
Each list displays the following details:
- List ID – Unique identifier.
- List Name – Name of the mailing or suppression list.
- Status – Active or Inactive.
- Subscribers – Total number of subscribers.
- Creation Date – Date when the list was created.
- Actions – Edit, download, or upload subscribers.
Settings: Managing Blacklists & Global Unsubscribes
Users can blacklist specific email addresses, entire domains, or add users to a Global Unsubscribe List, preventing them from receiving future email campaigns.
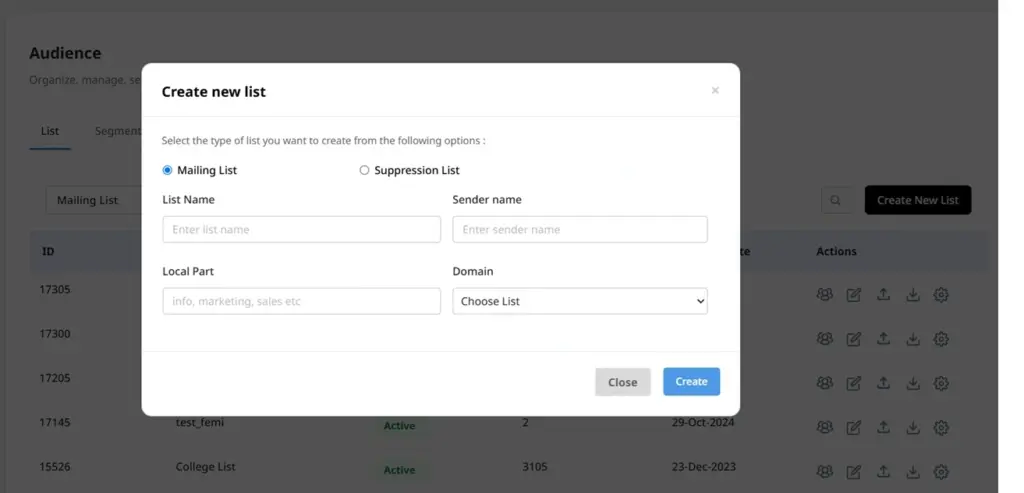
Creating a New List
- Click “Create New List”.
- Select the List Type (Mailing or Suppression).
- Enter required details:
- List Name
- Sender Name
- Local Part (first part of the sender’s email address)
- Domain (select from the dropdown)
- Description (optional)
- Click Create List to finalize.
- Add subscribers using the upload icon under the Actions menu.
Adding Subscribers
Subscribers can be added in two ways:
- Bulk Upload (TXT or CSV format)
- Manual Entry (adding individual contacts with demographic details)
Upload Options
During bulk upload, the following options ensure proper email status management:
- Update existing entries only
- Delete blank attributes
- Add existing attribute value for multi-select attributes
- Move trashed/unsubscribed/bounced entries to active list
- Add to global unsubscribe list
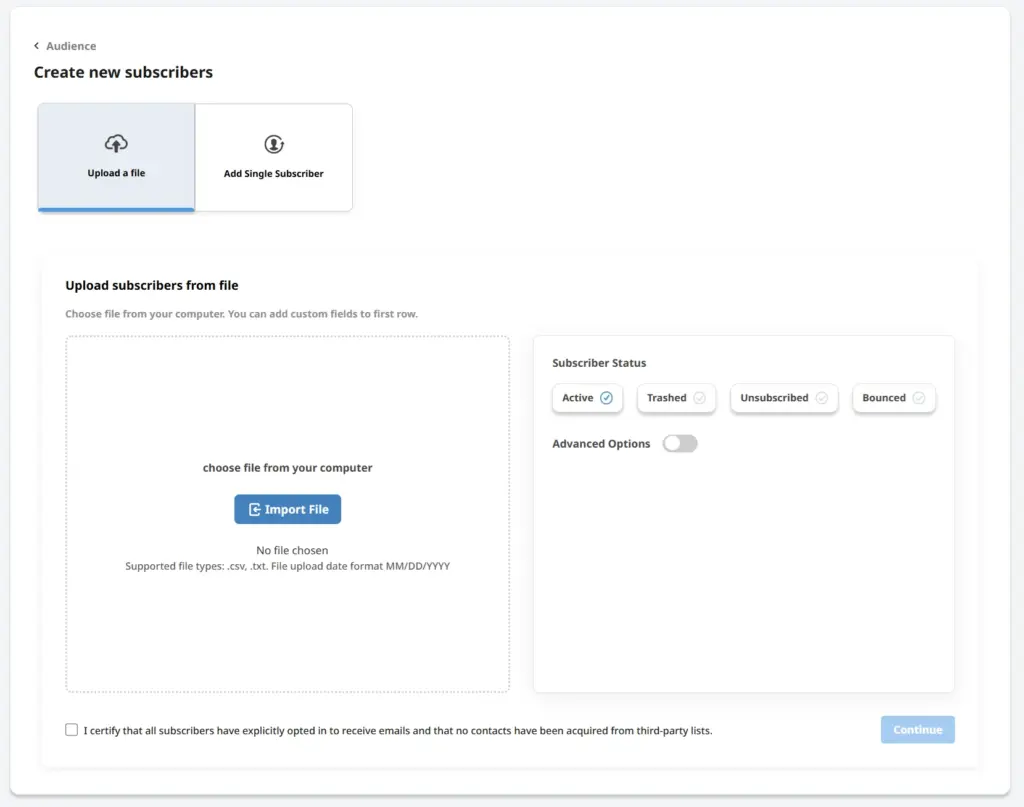
✅ Certification Checkbox (Required to Proceed)
“I certify that all subscribers have explicitly opted in to receive emails and that no contacts have been acquired from third-party lists.”
To ensure compliance with email marketing best practices and maintain list integrity, you must certify that all uploaded subscribers have explicitly opted in to receive emails and that no contacts have been acquired from third-party lists.
✔️ Important: The Upload button will only be enabled after you confirm this certification.


